In this tutorial, you'll learn how to make a cartography table in Minecraft step-by-step. And we'll show you how to use it in our video below.
A Minecraft cartography table is used to create and rename maps. Plus, you can use it to clone, zoom out, and lock maps. You'll also notice it's used as a job site block for cartographers in the game.
How To Make and Use A Cartography Table Video Tutorial
In this video, watch as we show you how to craft a cartography table and how to use it in the game! And be sure to subscribe to our channel and check out our Minecraft tutorials!
Subscribe To Our YouTube Channel

Available Platforms
| Edition | Platform | Available |
|---|---|---|
| Java Edition | Windows, Mac & Linux PC's | Yes |
| Bedrock Edition | Xbox One, Nintendo Switch, iOS, Android, Fire OS, Windows 10 PC's | Yes |
| Education Edition | Mac, iOs 12, Windows 10 PC's | Yes |
| PlayStation Edition | PlayStation 4 | Yes |
Materials Needed To Craft A Cartography Table
- 2 Papers
- 4 Planks (any type)
Steps To Make Minecraft Cartography Tables
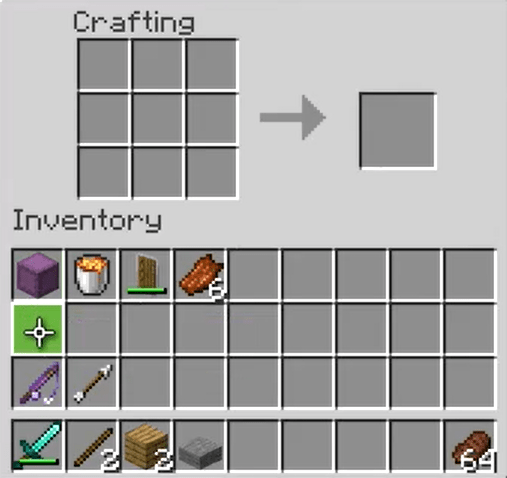
1. Open Your Crafting Menu
To craft a cartography table, you first need to open your crafting menu in Minecraft. You should see the same grid as in the image below.
2. Add the Paper and Planks to Make a Cartography Table
In the crafting table, add the papers and planks to the grid. You can use any type of wood planks available in the game, including oak, spruce, birch, jungle, acacia, or dark oak wood planks. In this example, we will be using oak wood planks.
You must add the papers and planks to the grid exactly as shown in the image below. In the 1st row place down 1 paper in the 2nd box and 1 paper in the 3rd box. In the second row place down 1 wood plank in the 2nd box and 1 wood plank in the 3rd box. In the 3rd row place down 1 wood plank in the 2nd box and 1 wood plank in the 3rd box. This is the Minecraft cartography table recipe.
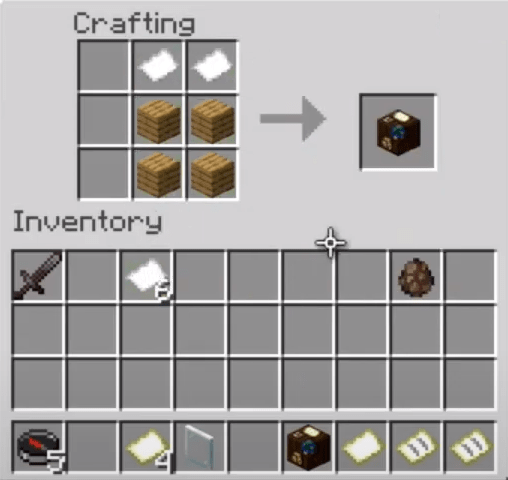
After you've added the items to the crafting grid as described above, you'll notice a cartography table in the box on the right.
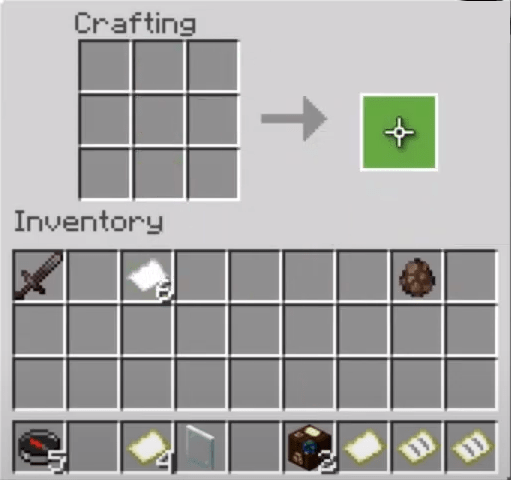
3. Move The Cartography Table To Your Inventory
Now, simply drag the cartography table down to your inventory so you can use it.
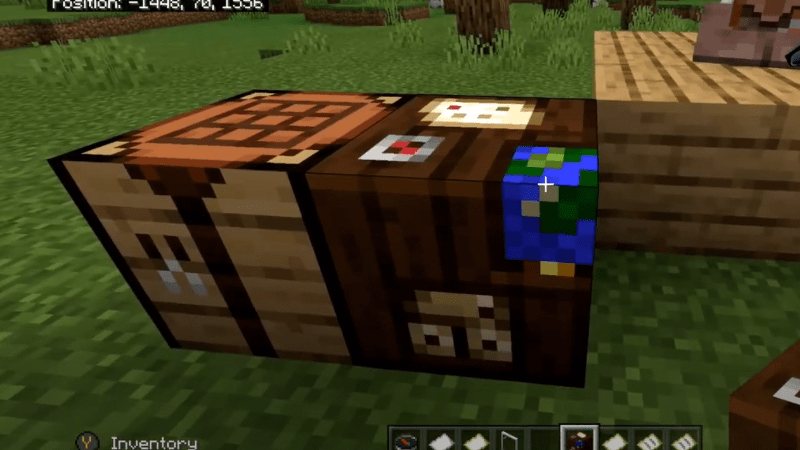
You're done! You now have a cartography table! A Minecraft cartography table is used to create and rename maps. Plus, you can use it to clone, zoom out, expand, and lock maps. You'll also notice it's used as a job site block for cartographers in the game.
Minecraft Cartography Table Command
You can also use a Give Command to make a cartography table in Minecraft. The cartography table command is available in the following editions:
- Java Edition
- Pocket Edition
- Xbox One
- Nintendo Switch
- Windows 10 Edition
- Education Edition
To run the cartography table command in Minecraft, open your chat window and enter the command below depending on the version you have.
Java Edition 1.13 and higher
/give @p cartography_table 1
PE, Xbox One, Switch, Win 10, Education Edition
/give @p cartography_table 1 0
Related Recipes